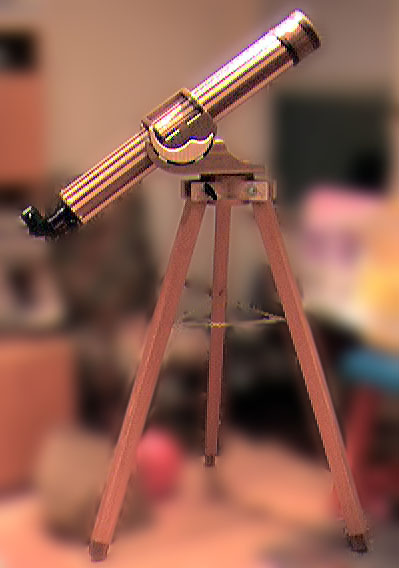
4" f10 Achromat "Okapi"
Winner of an Honorable Mention at the 1999 RTMC, and
Best Amateur Craftsmanship at the 2001 Table Mountain Star Party.
Winner of an Honorable Mention at the 1999 RTMC, and Best Amateur Craftsmanship at the 2001 Table Mountain Star Party.

I was looking for a project so when I stumbled on a good price for a research grade Vixen achromat, I decided to make a "throw it in the car and head out at a moment's notice" scope. I also wanted to make something esthetically pleasing. The result is the Okapi, a 4" f10 achromat with a hardwood tube and mount. I had originally planned to make a crayford style focuser (also mostly out of hardwood) but ran out of steam so I broke down and bought a commercial rack and pinion unit. I may go ahead and replace it someday, but it works pretty well for now.
The first order of business was to plan out the beast. Following the recommendations of the ATM list as to baffle placement, I ended up with the plan shown above.
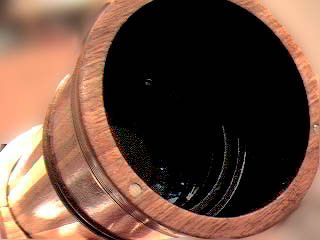
I decided to make the tube out of strips of wood using a similar method to the one I used on my 8" Newtonian. I made a form using a piece of thick-walled conduit with spacer rings at the baffle positions. The baffles were carefully cut out of 1/8" plywood using a circle cutter to leave a very sharp bevel on the inner edge and were then affixed to the spacers using rubber cement. 1/2" rings were then glued to the baffles to give the tube extra strength.
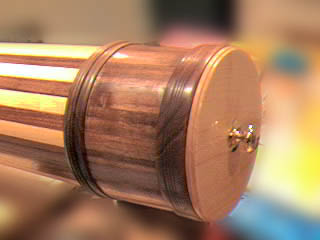
I formed a cylindrical holder for the lens cell by wrapping the cell in plastic wrap and then wrapping it with 1/32" veneer in several layers. When this hardened up it made a tight pressure fit holder for the lens cell. This was placed on the conduit using a couple of throw away disks.
Once all this was done, I cut the strips for the tube out of 1/4" stock. I could have gotten away with 1/8 and still have had a strong tube, but I don't own a planer and you just can't buy 1/8" hardwood anywhere. Before I cut the strips, I put a series of parallel grooves across each board by cutting to a depth of about 1/16th inch with the saw blade at 45 degrees. These grooves form a series of internal baffle ridges down the whole length of the tube.
Since the tube outer diameter wanted to be 5", the outer circumference was 15.7". Divide this by 1/2" and you discover you need 31 and a fraction strips. I ended up cutting the strips slightly oversize to end up with an even 30. 360 degrees divided by 30 is 12 degrees and 12/2 is 6. So each strip needed a 6 degree bevel on each edge. Once these were cut (using a hold down jig and featherboards on a table saw... if you try this be VERY careful of your fingers!) I started laying them up.
To glue the strips, I put the first strip on using high temperature hot glue. This was positioned very carefully to be perpendicular to the ends. Once that one was on as an index strip, I proceeded to glue on 3 or 4 strips at a time. I used Gorilla Glue (a polyurethane glue that foams on contact with moisture and acts as an excellent adhesive and gap filler) on both edges and the points of contact with the baffles and the cell holder. I then pressed the strips into place and held them with masking tape under considerable tension. Once the glue was set (about an hour), I would remove the tape and do the next set.
Once the tube was formed, I hand planed the tube to a circular
section. I then sanded it to about 400 grit while still on the
rod so I could rotate it as I worked. To remove the tube from
the form I marked the ends to length by rotating the tube against
a pencil. I then cut the ends with a fine tooth Japanese pull
saw. Once the ends were free, it was simple to push the rod out
-- taking the lightly adhered spacers with and leaving the baffles
attached to the inner surface of the tube.
Click on the images for larger shots.