Making the Mirror
|
|
Making the Mirror |
|
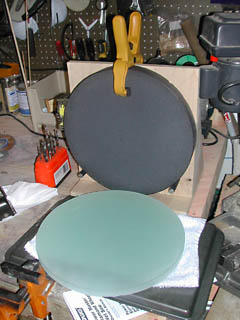
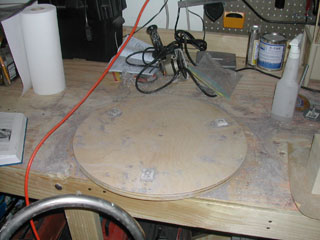
Grinding StationThe first thing I did was to build a grinding station on my workbench. I didn't have access to a barrel, nor was there space to store such a thing, so I opted for this design. Shown is the grinding setup after my initial attack on the back of the blank. A powerful shop vacuum and careful cleaning got it ready for the next stage. The round is cut form 3/4" birch plywood I had lying around. There are three UHMW plastic feet on the bottom to help it turn. The central pivot is a simple deck screw into the table top. The blocks in this picture are more plastic, but they were later replaced with wooden cleats. |
|
 |
|
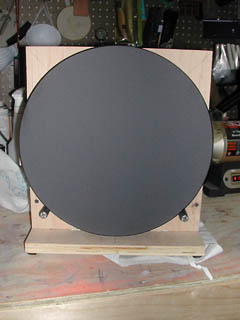
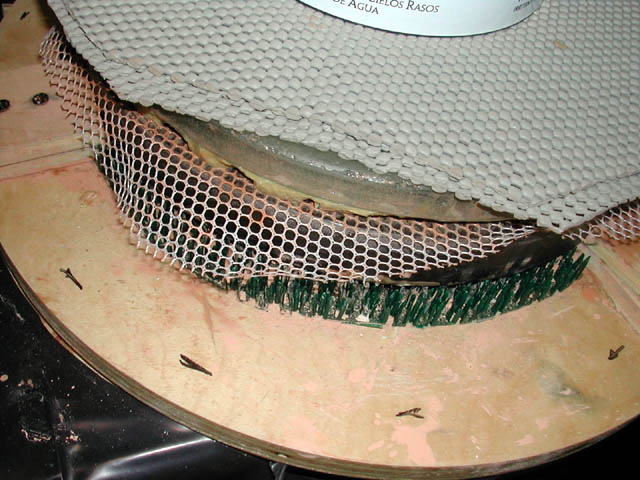
GrindingI purchased a grit kit from Newport and dug in. The blank had a pre-generated f5 curve that was pretty close, but I wanted to go on down to f4.5. It only took a short time with 80 grit to get close to the right sagitta as measured with feeler gauges. The picture is the blank and tool at the end of the 80 grit phase. The mirror is on a mirror stand built to the specs on the Stellafane Web site. The clamp is not totally necessary, but I didn't want to see the blank tip over and shatter. I used mirror on top chordal strokes to quickly get the curve close then switched to a W stroke to start getting the curve back to a sphere. When the surface was totally even in appearance, I cleaned up meticulously and went on to 120 Grit. BVC is very soft and each grinding phase went very quickly. The grits used were 80, 120, & 220 Silicon Carbide, and 25M, 15M, and 9M Aluminum Oxide. As I switched to the AO grit I got even pickier about cleanliness and stuck to a strict alternation of tool on top and mirror on top to keep the focal length relatively constant. I had one mishap with a relatively deep scratch from a stray grain of something which caused me to go back to 220 for a while, but it took only a weekend to go through all the grits to be ready to polish. I stopped at 9M AO grit since many references on the Web suggested that it was easy to polish out from there. This was, in my opinion, a mistake. I should have gone through to 5M to refine the surface and reduce polishing time. |
|
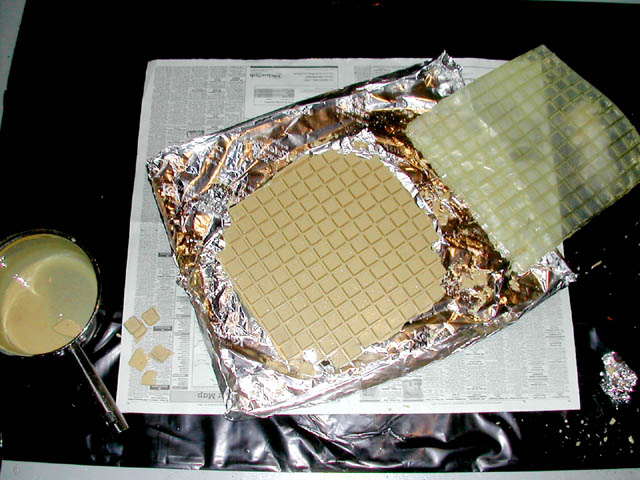
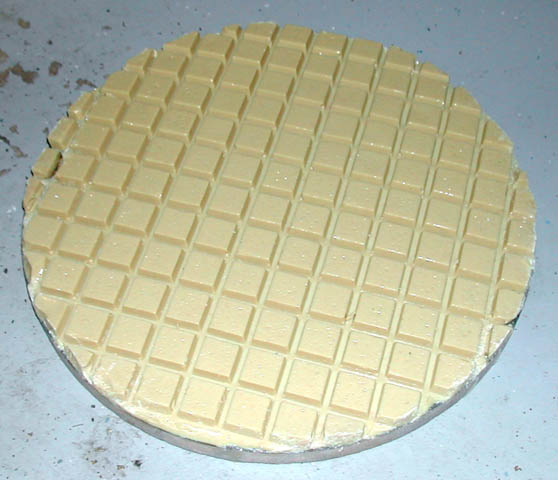
The Pitch LapThe tool used for polishing is made from either the grinding tool or cast from plaster or cut form wood. In my case, I chose to use the grinding tool. A layer of pitch squares is poured and adhered to the top of the tool and this pitch surface is what is used to perfectly match the curve of the mirror to be for the polishing process. I used medium burgundy pitch from Newport, and added a touch of some old hard stuff I had around to firm it up a little. My garage is chilly so the pitch tended to be pretty firm. I chose to cast a pitch lap using a purchased mold for neatness and convenience. The neatness side was especially important to me as pitch is a remarkable material that is sticky, crumbly, soft, and brittle all at the same time. It sticks to virtually everything and it loves to flake off in tiny bits that you will find only when you discover your hand is stuck to your car's steering wheel. I purchase the LM-3 mold from Kevin McCarthy along with some of his mold release spray. The mold is placed on the mirror (after protecting it with a layer of plastic and/or a paper towel), molten pitch is poured into the squares, and the tool is placed face down on the mold. Once the pitch has hardened, you simply pick up the tool, peel off the mold, trim the lap and you are ready to press. The lap was warmed in a sink full of 110 degree water then warm pressed on the mirror using a CEO slurry as a release agent with a layer of netting to produce micro-facets. Once full contact was achieved I was ready to polish. The mold allows the initial lap to be very close to full contact immediately and the warm press takes very little time. |
|
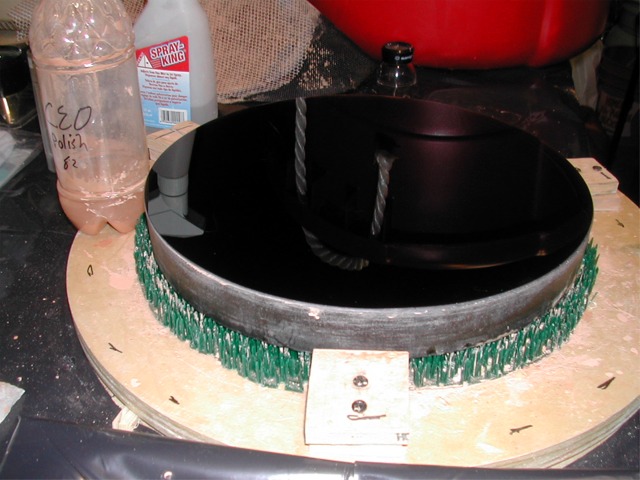
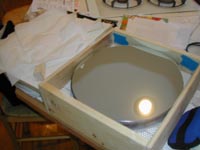
PolishingOnce the pitch lap was ready, I assembled my polishing station. I cleaned the grinding area thoroughly then covered the whole area with a plastic sheet to hold down and grit I might have missed. I bought a new rinse tub. I made a new turntable just in case grit was trapped anywhere in the old one. At the same time, I also added a layer of a plastic astro-turf like door mat form Home Depot as a mirror support. This should act like a thousand(s) point cell and should help keep the mirror from turning astigmatic during polishing. |
Shiny after 6 hours |
|
Now for some magic. A hunk of dull glass gets shiny. It only took about an hour of polishing to get the dull gray glass to be reflective enough to see yourself in. This is very cool - if misleading about the pace of polishing. The polishing process is a physical, chemical, and thermal process which is not totally understood (as far as I can tell from my reading) by anyone. The consensus seems to be that polishing compound acts like tiny planes which shave off the glass, and that the right kind of compound will also have a chemical reaction with the glass making the smoothing action more pronounced. The compound I am using is Cerium Oxide (more properly, Cerium Dioxide or CEO2), a pinkish powder which is suspended in filtered water for application. The procedure I am using is to cold press the lap with about 20 lb. on it for 15-20 minutes prior to polishing. I then blot the lap, add a small amount of dilute polishing compound to the mirror and distribute it with the side of my hand. I then place the tool or mirror (depending on which is on top) gently and proceed with a center over center 1/3 stroke (overhang of no more than 2 inches on each end of the stroke). I put as much of my weight on the mirror as I can. The tool or mirror is rotated slightly after each stroke, and the turntable is rotated 1/8th to 1/4 turn after every 6-8 strokes. I go one hour with mirror on top and then switch to tool on top. |
|
|
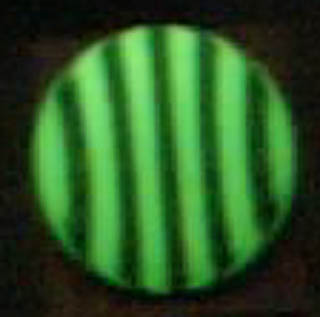
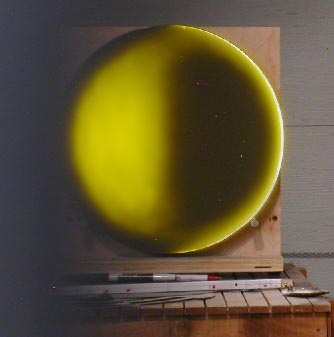
To make sure I didn't have a hopelessly messed up mirror, I stuck it on the tester (see details below) with a Ronchi grating to see what the shape was looking like. It turns out I have an oblate ellipsoid (a squashed sphere) with a decent, if slightly turned, edge and good smoothness -- which is not too bad. At this point, I have approximately 9 hours of polishing in and the surface is looking pretty smooth. Water is no longer liking to pool - it sheets off and the mirror squeaks when wiped. It is still not passing the laser test, but progress is being made. Under a 10X magnifier, the laser still picks up pits -- the result of only grinding to 9 micron. I hope to be able to pass the laser test in another 3-4 hours of polishing. I will then go an additional couple of hours with a thicker CEO mixture to really smooth the surface. |
Ronchi inside ROC showing slightly oblate ellipsoidal shape |
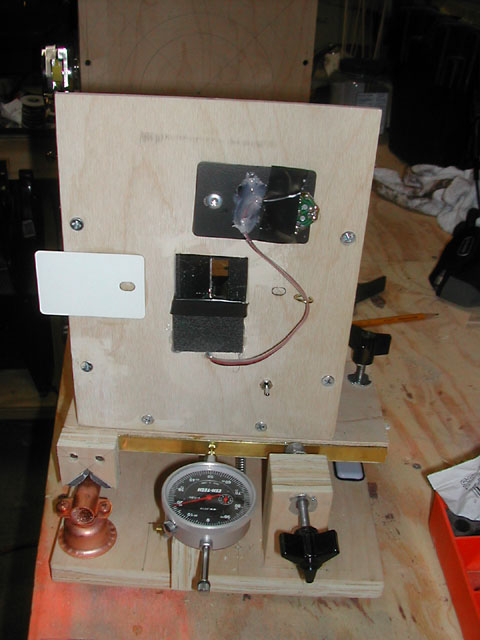
The TesterTo be able to move beyond qualitative to quantitative testing, you need some sort of test rig. The most common tool used for mirror testing is the Foucault Tester. These are pretty much a triviality to build and it is perversely satisfying to know that you are able to measure something to a thousandth of an inch using a bunch of plywood and bolts. I built my tester from plans available on the Stellafane site and it works pretty well. As I get to the figuring stage, it will become a critical component. For now it is being used as a Ronchi tester by replacing the knife edge with a 150 line grating from Edmund.
|
My Foucault Rig |
FiguringComing soon... with luck. |
|